
How to Make a Wood Box
Design a Wood Box like a Professional Woodworker
Designing and building your own wood box is incredibly satisfying. But where do you start? There are a lot of options and styles so let's talk about the general ways to construct a wood box and what you should consider in order to be successful in your project.
Box Size & Shape
It may seem almost too simple of a question, but it needs to be asked: How big of a box do you want to make? Here's why it's important: The box size impacts the amount of material you need and the other design decisions you will make. Spend a good amount of time thinking about the size and shape of the box you want to build and ask yourself some questions.
How wide and long do you want the box?
How tall will it be?
Are you putting something specific inside it?
Will the box have a lid? If so, will it sit on the box, or will it attach with hinges?
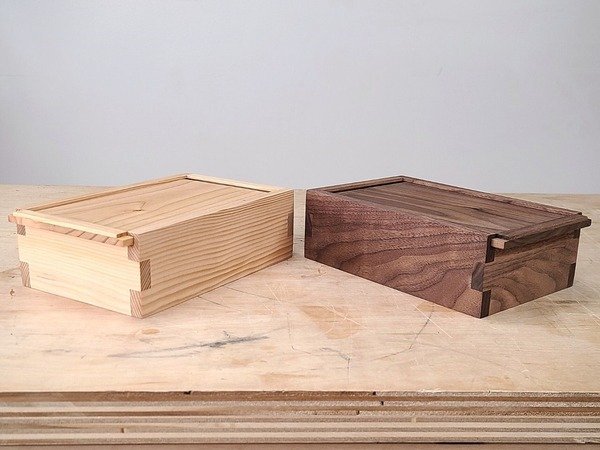
If you have free reign to customize the size and shape, then I find a rectangle to be visually pleasing. I like to make them at a ratio around 5" wide x 8" long. If I want a bigger box, I may add equal lengths to the width and length, such as 6" wide x 9" long, 7" wide x 10" long, etc. I'm not married to this exact ratio. I've made plenty that are 4x8 or 9x9 and think they look great. However, the abovementioned measurements are my go-to dimensions when designing a box.

The Golden Ratio
The golden ratio is the long held belief that there is a size ratio between lengths that is the most aesthetically pleasing. This is something that’s been studied for thousands of years. There are resources online to show how to calculate the golden ratio for various shapes, but we’re talking about making boxes so it’s pretty easy to identify our “perfect” ratio. Take the short side of your box and times it by 1.618. For example, if you know you want a box to be 12” wide, then you would multiply 12 by 1.618, which equals 19.416” long. I’d round up and say, according to the golden ratio, a 12” x 19.5” box is generally considered to have perfect dimensions. It works by calculating length too. If you know you want a 19.5” long box, you would divide 19.5 by 1.618, which equals 12.05” wide.
Earlier, I listed my go-to box dimensions. I came up with these through trial and error, not math. Let’s test them out. I like to make boxes 5” wide x 8” long. Well, 5” wide multiplied by 1.618 equals 8.09” long. Hey, not bad for someone who did not purposefully use the golden ratio and simply eyeballed it!
Box Height
For height, I typically make boxes about 3" tall. This number could change if I have a specific use for the box that requires a different measurement or if I'm making a very tiny box . There are two primary reasons why I shoot for 3" tall. If my boxes are the width and length described above, the box may look disproportionate if it's very short or very tall. I admit, this statement is completely subjective. The second reason for 3" tall is the real estate. The box will sit on something, a table or counter perhaps. I don't want it taking up a lot of space, literally and visually. As far as my exception goes, I don't want my box to be top heavy. Imagine a tiny 2" long box that's 3" tall. That is going to look incredibly tall compared to an 8" box also at 3", even though the actual height is the same.
Wood Storage Box Plans
Make you own wood box using my digital plans. They take you step-by-step through the build process.

Type of Wood
Wood varies from super soft, like balsa wood, to incredibly hard, such as lignum vitae. When I refer to the hardness in this article, I'm not specifically describing the technical terms of Softwood vs Hardwood. In the lumber industry, softwood is a category for conifer-like species of trees. This includes pines and furs that make up typical construction lumber. Hardwood describes trees that lose their leaves annually. There are softwoods that are harder than the hardwoods. Confusing, isn't it? Balsa is technically a hardwood even though it's incredibly soft. Douglas fur is a softwood even though it's much harder than balsa wood. All that being said, in this article, when I talk about a soft wood vs a hard wood I'm referring to the actual hardness or density of the species.
Think about how you plan to use the box and the potential wear and tear. A soft wood is going to damage more easily than a harder wood. At the same time, that doesn't mean you should use the most dense wood on the planet. Look at the wood itself and pick a species that appeals to you, regardless of its hardness. Then, look into other woods that have a similar look / color that may be softer or harder. Perhaps you like the color of pine but want something more durable. You can then look at maple or beech. I'm a firm believer that a woodworker can make even the worst looking 2x4 stud appear like a beautiful work of art.
Material Thickness
How thick should you make the box’s sides? This is basically subjective and based on your taste, with one exception, which I’ll talk about later. I am not partial to a chunky looking box. Visually, it can seem out of balance. Again, this is my preference and may not be yours. Conversely, a box with super thin features can look just as jarring to me.
When it comes to box sides, I believe the sweet spot for most small to medium size boxes is between 1/4" and 1/2" thick. The smallest of the small boxes I make will be closer to 1/4". The largest of the medium size boxes, for example a 10"x10" box, may be closer to 1/2". My go-to is 5/16" to 3/8" thick material for box sides. It scales up from there. The larger the box, the thicker you will want the sides.
Here's a trick I constantly employ. Draw your box from a top down view. For a 5" x 8" box draw a rectangle to scale on a piece of paper or cardboard. Now, draw the interior size using the material thickness you want. For our example, I chose 3/4" thick wood. Step back and assess. Does that look right to you? Does it look too chunky? Let's redraw it using 3/16" thick wood. Now, how do you feel about it? Keep doing this until you find the thickness that you find most appealing.

Remember when I said there was an exception? Here it is - if you plan to have a lid, will you attach it to the box with hinges? You will want to purchase your hinges ahead of time and ensure your box sides are thick enough to accommodate them.

Box Bottom Thickness
The box bottom is a bit easier to determine. People typically can’t tell the thick of the bottom because the edges are not visible. My go-to bottom thickness is 5/16”. Then I adjust accordingly if need be. This description may sound vague. I admit it is, and that’s because the thickness of box bottom technically only matters when it has to perform a specific function. For example, if you plan to store 100lbs of stuff in a box then you may want a thicker bottom so it doesn’t flex under pressure.
Many woodworkers use thin box bottoms, such as 1/8” or 1/4” thick material. I may do this if the box is very small, but I prefer not to for one primary reason - sound. It may seem odd, but the sound of a box bottom matters to me. Place something in a box with a thin bottom and pay attention to the sound it makes. A thin bottom has a hollow sound that, to me, is less appealing when compared to the solid sound of a thicker box bottom. Believe I’m overthinking this? For this very reason, automobile manufacturers specifically design car doors to have a certain “thud” when they close because the sound gives the car an air of quality.
Joinery
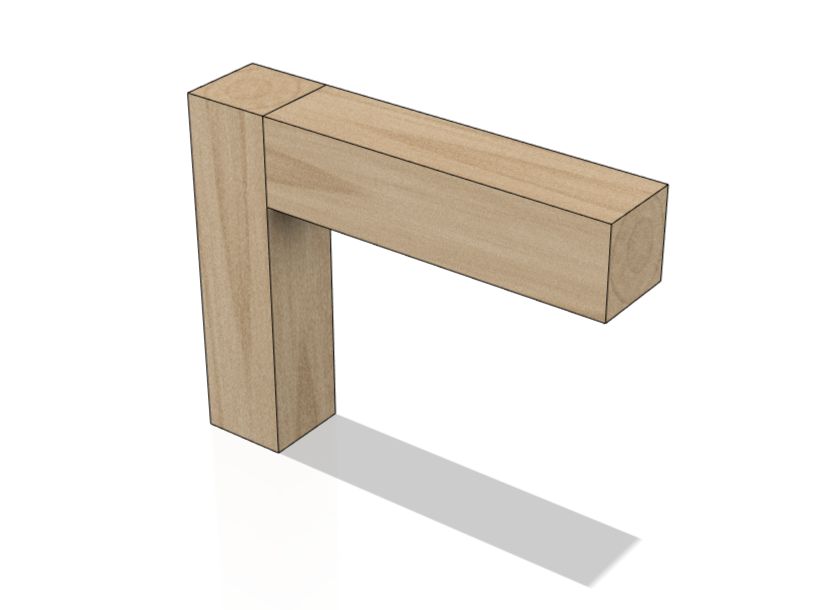
Joinery is basically a fancy word for "how do the sides fit together?" For someone new at box making, the sheer number of joinery options can seem daughting. Don't get overwhelmed. Let's break it down.
Two of the most common joinery types for boxes are miter joints and butt joints. While common, these are incredibly weak and run a good chance of breaking over time. This is because we are applying glue to the end grain of the wood. Imagine that a piece of wood is a stack of straws. The ends of those straws are the end grain. Put glue on the sides and it pretty much stays in place. Apply glue on the ends and it flows down into the straws and doesn't stay on the surface. The same thing happens to wood. You can glue the end grain of boards together, but it won't have the same bonding strength as gluing the boards side to side (also called "long grain").
Butt Joint

Miter Joint
Another option is to use a weaker joint like a miter or butt joint, but reinforce it to add strength. This could be as simple as adding nails or screws. You could also use wood splines.

Woodworkers will often use a joint that provides some sort of long grain to long grain glue bond, such as box joints or dovetails. While they may look more complicated to make, they are incredibly strong joints. Joinery like this provides its own visual interest and can be a fantastic design element.
When it comes to box making, joinery is basically a whole topic within itself. It really boils down to this - You want to shoot for a long grain to long grain glue-up if possible. If using end grain, it's best practice to reenforce the joint in some way. You absolutely don't have to. I know I haven't always done this. I also know I'm taking a risk that the box could break.
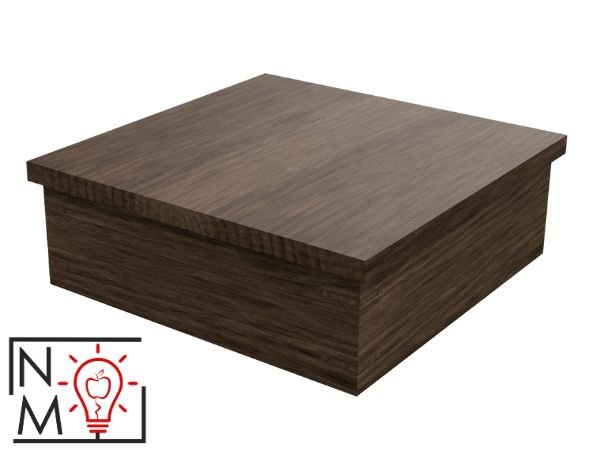
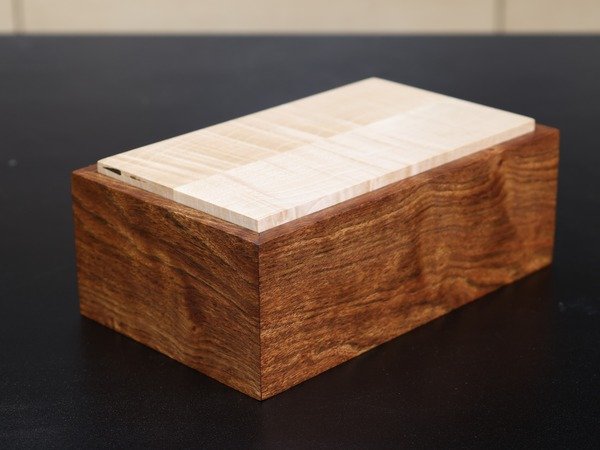
Box Lid
Will your box have a lid? If yes, will the lid be attached with hinges or completely removable? I asked these questions earlier so you could determine your material thickness. It also matters for construction. My lids are almost always removable because I prefer the look better. But, I don’t simply set a board on top of the box and call it a day! I need a way to keep the lid in place so it doesn’t slide off. The most common method to do this is have the lid sit down into the box a tiny bit.
There are a lot amazing pictures online of beautifully crafted boxes. The way the lids sit on those boxes isn’t necessarily highlighted so take some time to notice that specific aspect. You will quickly see the most commonly used methods. This “monkey see, monkey do” technique will help you to design your own box, leading to more experience and the development of your own design concepts.

Box Handle
One thing you may notice with many of my boxes is the lack of a handle. I believe a box handle can make or break the look of a box. Imagine a box with clean lines and a contemporary look. Now, picture putting a large, ornate handle on top of it. The handle would give off a whole other vibe. It’s a good rule of thumb to keep the handle in the same style as the rest of the box. For example, a box with thin features will probably benefit from a handle with thin features. I prefer clean looking boxes, that are fairly small. A benefit of liking this style and size box is I can opt to not have a handle. I can keep the top of the lid clean looking. This is a great technique when using figured wood. Let the wood do the talking!
Where do you go from here?
I outlined a lot to consider when designing a box. The great thing is that most of this will ultimately come to you faster than it took to actually read this article! As you make more and more boxes, you will find a style you prefer. You will know the size boxes you enjoy making. Conversely, you may find certain box features you don’t like, and make your design decisions from there. Regardless, it’s time to put that design effort into practice. Get in your shop, starting making your box, and build your skill. Next thing you know you’ll be prolific at building them.